How to Make the Perfect Summer Braid
Summer is the time when most of us desire to explore our fashion choices, and to try a new hairstyle! But it can be challenging to create a new hairstyle on your own! We've all been there when we've given up trying a new style and just gone for the basic ponytail. BUT here we have found the perfect texturized summer braid that is simple enough for anybody to create. Whether you want to try a new hairstyle for work, you want to be creative in your spare time, or you want to practice an elegant braid hairstyle for a sophisticated event like a wedding, this blog will guide you to craft a unique braid hairstyle perfect for summer. Here we have put together some easy to follow simple steps for how you can transform your wig (or your own hair) into a brand new braid.
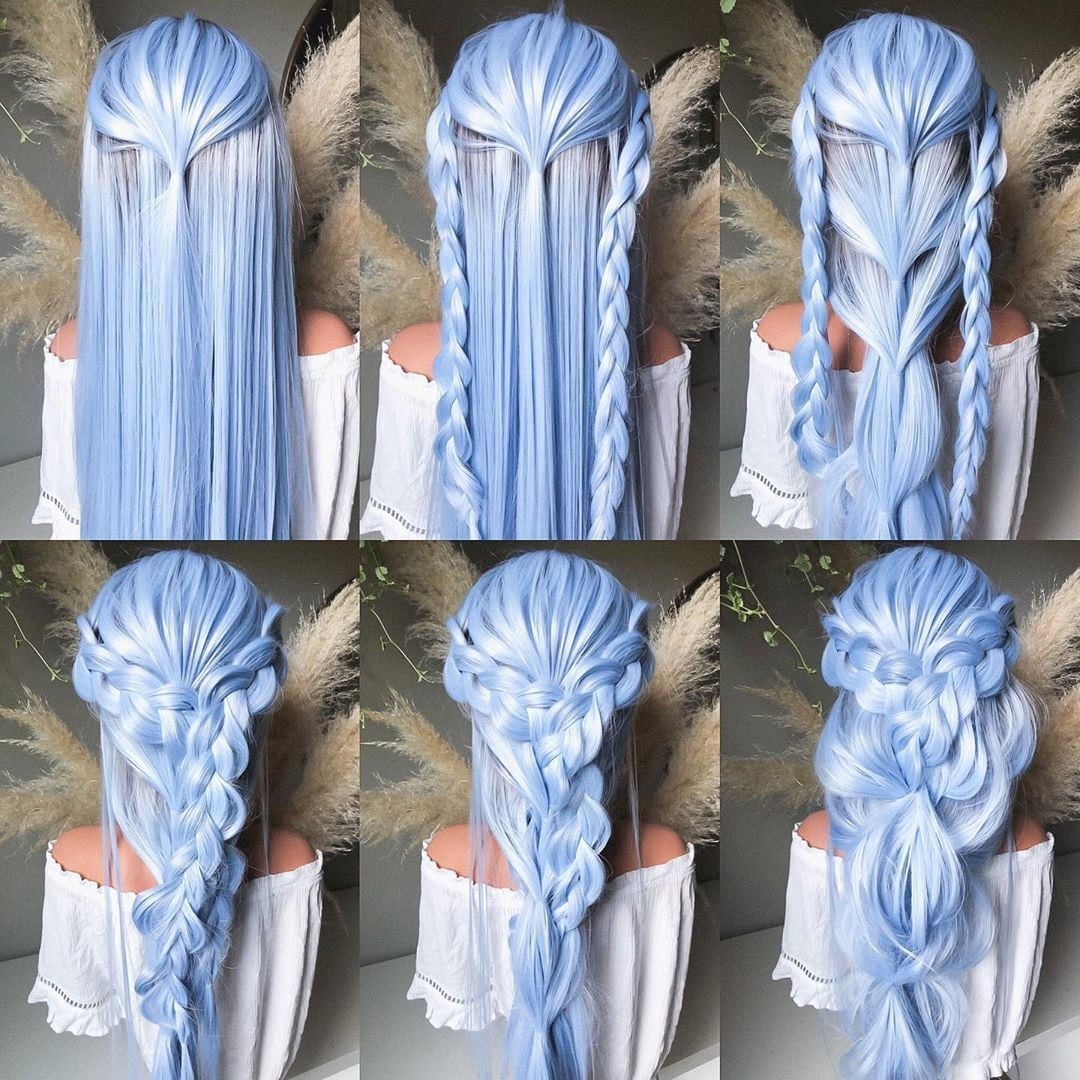
Braid by @styles_by_reneemarie
Step 1: Tie off the crown
Firstly, using a clear elastic band, portion off the hair at the crown and tie up, leaving out some face framing pieces of hair at the front if you desire. You can also pinch out the top of the hair to add some volume.
Step 2: Create a Dutch Braid on either side
Next, using hair either side of you're the middle section, braid two medium sized Dutch Braids all the way down to the bottom, and then tie off each with a clear elastic band. Pinch out the braids for fullness.
Step 3: Tie off the horizontal section that ends at the nape
Now, take a horizontal section of hair that ends at the base of the neck like in the picture, and tie off with a clear elastic band.
Step 4: Split the remaining hair into two and tie off
Then, grab the remaining hair underneath, and split into two, tying off above the previous section. Do the same to the section below that.
Step 5: Criss-cross the braids and tuck them in
Now, for the tricky bit, criss-cross the Dutch braids, and carefully tuck them inside the lower sections you just made, securing with bobby pins and using an elastic as an anchor.
Step 6: Add texture
Finally, pinch and pull the braid to add texture and volume throughout. Now your braid is finished, and you can leave it as it is, or accessorize it with a silk scarf, pearls, flowers or anything you would like!
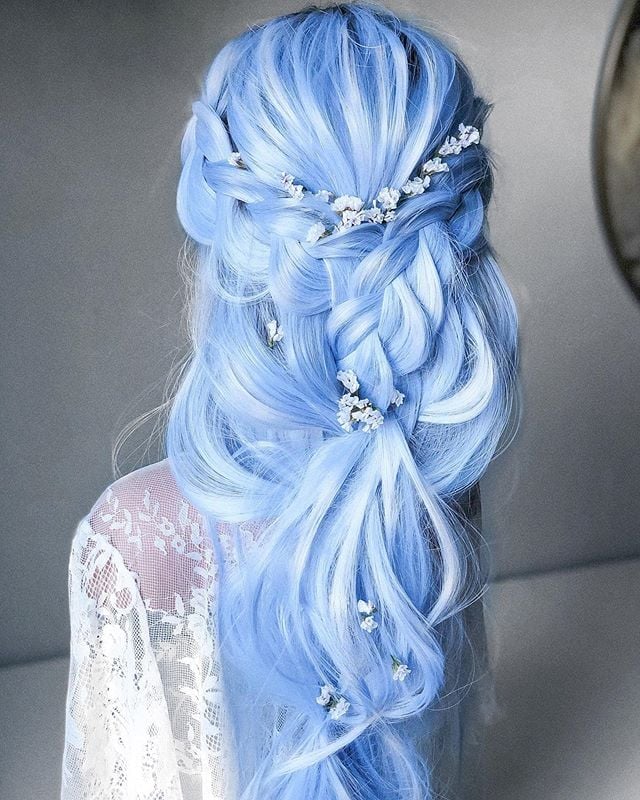
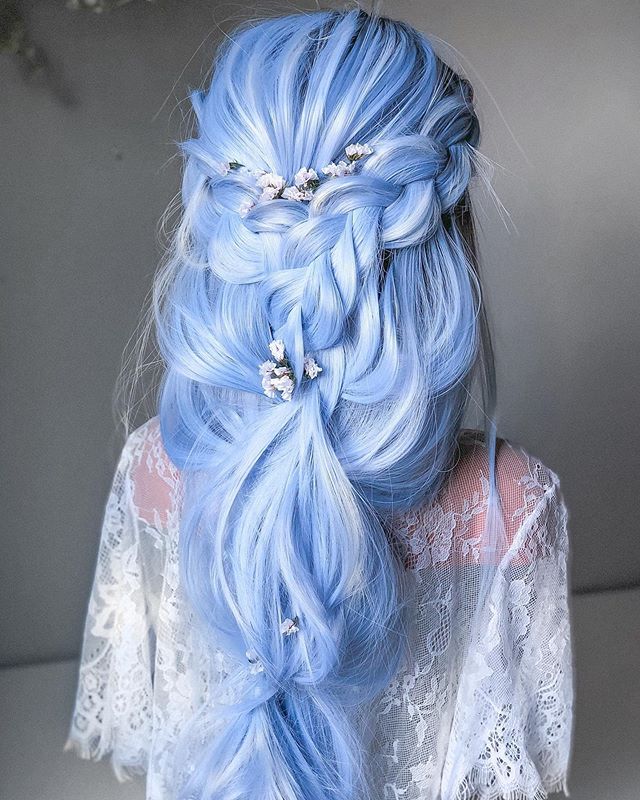
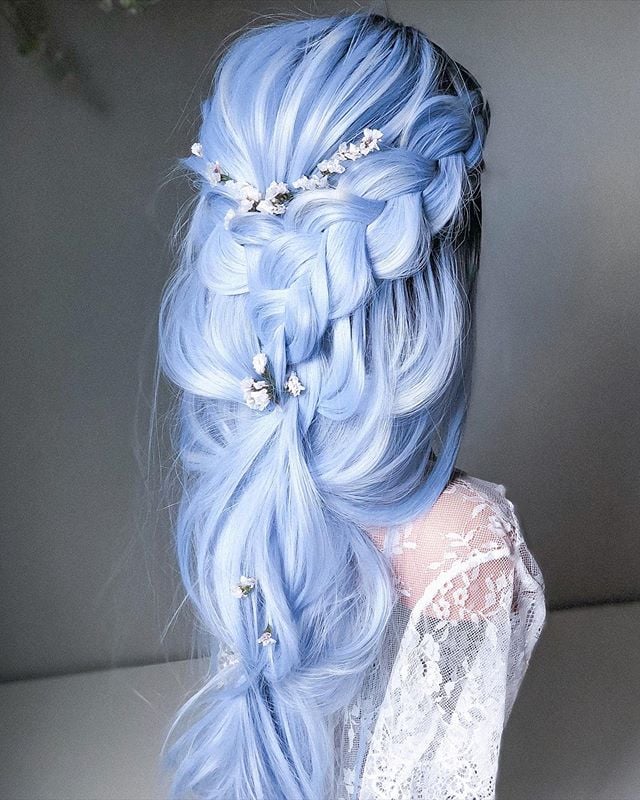
Enjoy more braids from Renée Marie -- Artist Connective of Modern Salon
Read More:
SHARE:
Popular Posts
-
Hair Toppers for Different Stages of Hair Loss: Which One is Right...
![]() 423
423 -
Glossary of Wig and Topper Terms Every Buyer Should Know
![]() 376
376 -
UniWigs Hair Topper Length Guide: Live Comparison & Real Customer...
![]() 324
324 -
The Ultimate Courtney Family Guide: How to Choose Your Perfect...
![]() 197
197 -
What Interests You About the UniWigs European Hair Collection
![]() 155
155
 423
423 Writers Cooperation:
UniWigs are seeking for blog contributors who know and love hair. If you know alternative hair or hair related accessories, if you have great understanding of hair trends and fashion, if you are expert in hair care, if you have any experience with salons or celebrities, if you would like to share your experience to help people just like you make the right choice, now contact us at [email protected] to be a blog contributor. Let’s discuss the details then.
Comments
Welcome Back!
Forgot your password?